
 Pin it
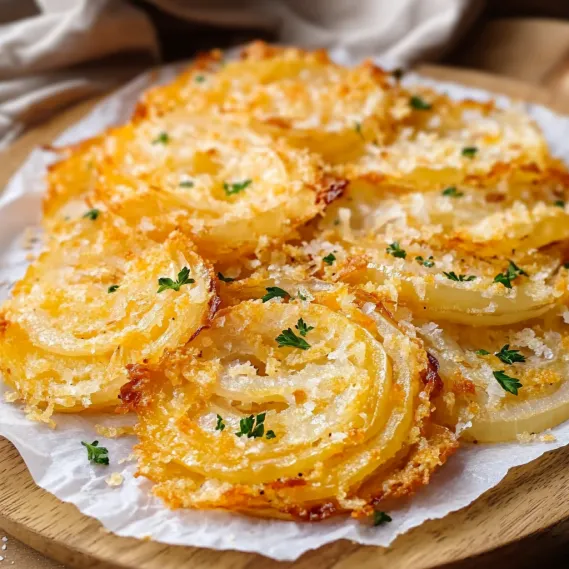
These golden, cheese-coated onion bites turn ordinary onions into crispy treasures that vanish moments after serving. I stumbled upon this idea last Christmas when I needed something speedy but fancy, and it's become my go-to party trick ever since.
My next-door friend practically pleaded for the instructions after sampling these at my winter gathering. I always enjoy seeing people's shocked faces when they find out they're just eating fancy onions.
- Large onions: Pick Vidalia or other sweet ones for the tastiest results
- All purpose flour: Forms the foundation that everything else sticks to
- Salt and pepper: Basic seasonings that boost the onions' natural sweetness
- Eggs: Work as glue for the crunchy outer layer
- Milk: Makes the egg mix just right for coating
- Sharp cheddar cheese: Gives a punch of flavor and stretchy melty goodness
- Breadcrumbs: The key to getting that satisfying crunch
- Parmesan cheese: Adds a rich taste and helps brown the outside
- Fresh parsley: Gives a pop of color and freshness
- Olive oil: Gets everything nicely browned in the oven
- Get Everything Hot and Ready:
- Heat your oven to 400°F and line your baking tray with parchment. The paper stops sticking and makes cleanup a breeze. Brush some olive oil on the paper for extra protection and flavor. A hot oven from the start makes sure browning happens right away.
- Set Up Your Coating Stations:
- Make a little production line with three bowls. First bowl gets flour mixed with salt and pepper. Stir it up so the seasonings spread out evenly. Second bowl needs eggs and milk whisked until smooth. Third bowl combines breadcrumbs with both kinds of cheese. This order works best for good coating.
- Get the Coating Just Right:
- Take each onion slice and roll in flour, shaking off the extra. Then dunk in the egg mix, letting drips fall off. Last, press into the cheesy breadcrumb mix, making sure it's totally covered. Try using your left hand for dry stuff and right hand for wet stuff to avoid messy fingers.
- Lay Them Out Properly:
- Put your coated onion pieces on the baking sheet with some space between them for air to move around. Drizzle or spray more olive oil on top to help them get crispy and golden. Don't pack them too close or they'll steam instead of crisp up.
- Cook Until Just Right:
- Stick them in your hot oven for 20 to 25 minutes. Check after 15 minutes to see how they're browning. If some parts are cooking faster, turn the pan around. You'll know they're done when they're deep gold outside, soft inside, and the cheese has melted and browned a bit.
The real hero in this dish is definitely the sharp cheddar. I tried making them once with mild cheese and they just weren't as exciting. The strong cheese taste balances out the sweet cooked onions perfectly, creating that can't-stop-eating-them flavor.
Prep Ahead Tricks
You can get these onion treats ready and keep them in the fridge uncooked for up to 4 hours before your party. Just add about 5 more minutes to the baking time if they're cold. You can also cook them early and warm them up in a 350°F oven for 5 minutes right before serving. They won't be quite as crispy but still taste great. For longer storage, freeze the uncooked pieces flat, then put them in a container. Cook straight from frozen by adding 7 to 10 extra minutes.
Tasty Combinations
These cheesy onion crunchers go well with tons of main dishes but work especially great next to grilled meats or thick stews. When serving as appetizers, try adding something fresh like a citrus fruit salad to cut the richness. A cool sour cream or ranch dip makes them even better. Drink-wise, try a light beer or dry bubbly wine to balance out the richness.
 Pin it
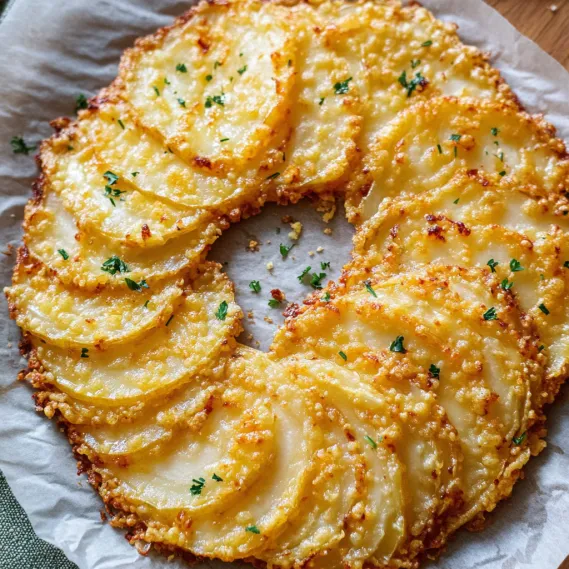
How to Slice Like a Pro
Getting your onion slices the same thickness really matters for even cooking. Try putting your onions in the fridge for 30 minutes before cutting to stop your eyes from watering and get cleaner cuts. Use a super sharp knife or a mandoline set to about 1/4 inch thick. Too thin and they'll burn before cooking through, too thick and the middle might stay raw. You can pull the rings apart for smaller bites or keep them whole for bigger, showier pieces.
 Pin it
Frequently Asked Questions
- → How can I make sure the crisps stay crunchy?
To get that perfect crunch, coat each onion slice thoroughly and place them without overlapping. A drizzle of olive oil on top helps create that golden, crispy finish.
- → Can I prepare these ahead of time?
Prep the onion slices and breading mix ahead, but bake them fresh for the best crunch and flavor when serving.
- → What dips go best with them?
Try creamy ranch, zesty garlic aioli, or even tangy marinara. Feel free to experiment with what you like!
- → Can I swap out the cheeses?
Of course! Mozzarella or Gruyère work great too, but cheddar and Parmesan really bring out the best savory flavors.
- → Can I use an air fryer instead?
Yep! Set your air fryer to 375°F (190°C) and cook them in small batches for 12-15 minutes, shaking occasionally until crispy.
- → How should I store leftovers?
Keep them in a container that seals tightly and refrigerate for up to 2 days. To bring back their crunch, reheat in an oven or air fryer.