
 Pin it
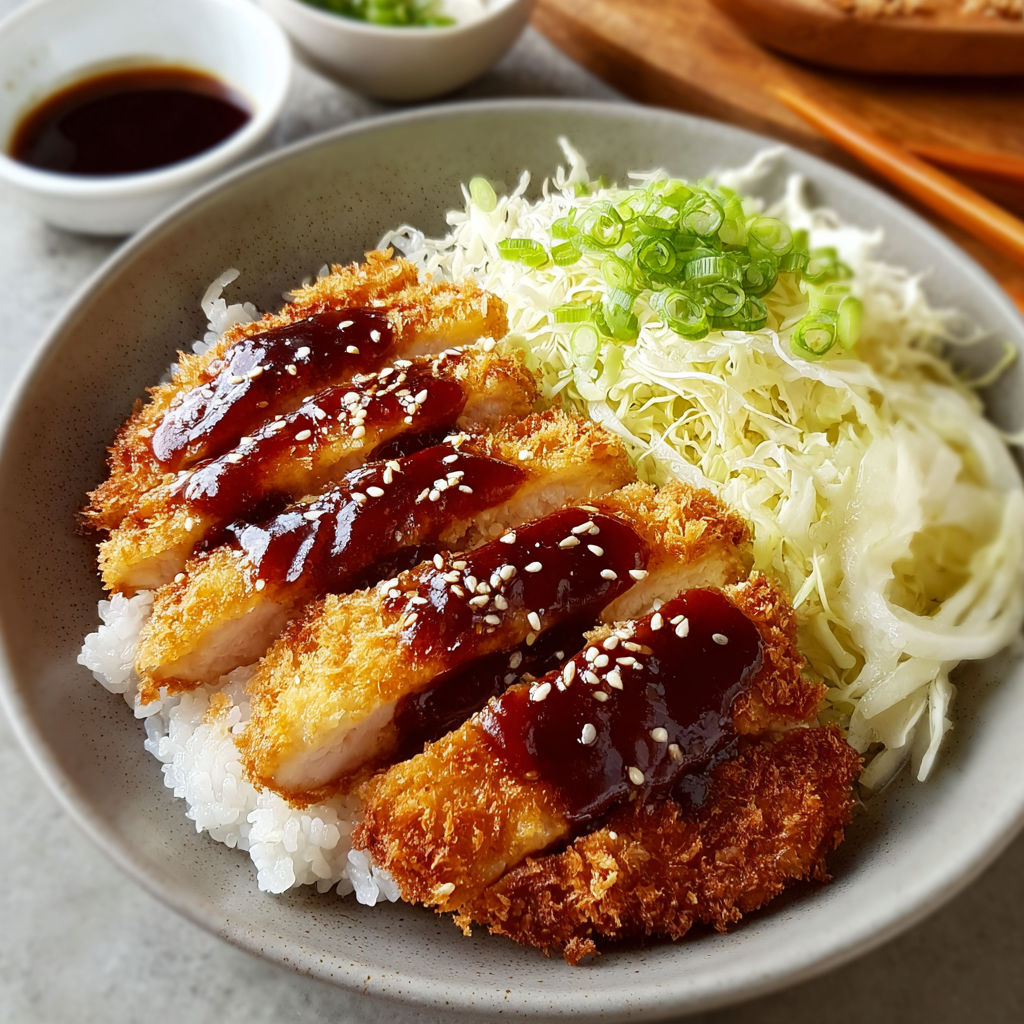
This crunchy Japanese katsu bowl with homemade sauce brings the real deal taste of a Japanese eatery straight to your dinner table. The crisp fried cutlet next to fluffy rice and fresh cabbage makes a filling meal that'll wow your family while hitting all the comfort food spots.
I picked up how to make katsu during my travels in Japan, where I fell in love with that perfect mix of crispy outside and juicy meat inside. I tried making it tons of times at home, and this version finally nails that special texture. It's now our go-to Friday dinner tradition.
- Chicken breasts or boneless pork chops cut them evenly so they'll cook the same all over
- All purpose flour makes the first sticky layer for everything else to grab onto
- Large egg works as the glue that holds the breadcrumbs in place
- Panko breadcrumbs they're airier and make a much better crunch than regular breadcrumbs
- Vegetable oil grab something plain with high heat tolerance for frying
- Ketchup adds sweet tomato flavor to your sauce base
- Worcestershire sauce brings that deep savory kick to your sauce
- Soy sauce gives that salty punch and depth
- Mirin sweet rice wine that's key, but you can swap in honey if needed
- Dijon mustard adds a bit of zing and warmth to balance the sauce
- Garlic powder gives flavor without chunks in your smooth sauce
- Japanese short grain rice gets nice and sticky to catch all that yummy sauce
- Shredded cabbage adds fresh crunch against the hot fried meat
- Green onion brightens up the bowl with color and mild flavor
- Toasted sesame seeds skip 'em if you want, but they add nice nutty flavor and look pretty
How To Make Incredible Japanese Katsu Bowls with Tonkatsu Sauce
- Prepare the Meat
- Bash your pork or chicken to about half an inch thick all around. This helps it cook fast and stay tender. Sprinkle both sides with salt and pepper to build good flavor from the start.
- Set Up Breading Station
- Get three shallow dishes ready in a row. Put flour in the first one, beaten egg in the middle, and panko in the last dish. Lining everything up makes the whole process way cleaner and faster.
- Bread the Cutlets
- Take one piece of meat at a time and roll it in the flour, then shake off any extra. Dunk it fully in the egg mixture, letting drips fall off. Last, push it firmly into the panko, making sure it gets covered completely on all sides.
- Fry to Perfection
- Get your oil hot in a heavy pan until it hits about 350°F. You'll know it's ready when a few breadcrumbs dropped in start bubbling right away but don't burn. Slide the breaded meat carefully into the hot oil and cook about 3-4 minutes each side until it's golden brown and reads 145°F for pork or 165°F for chicken inside.
- Rest and Slice
- Move your fried cutlet to a wire rack or paper towels to drain off extra oil. Let it sit for 3 minutes before cutting into strips. This waiting time lets all the juices spread back through the meat so it stays super moist.
- Make Tonkatsu Sauce
- While your meat rests, mix all your sauce stuff in a small bowl until it's nice and smooth. You want it thick but still easy to pour. Give it a taste and tweak it if needed.
- Assemble Your Bowl
- Put a big scoop of warm rice in each bowl. Lay your sliced katsu on top, tilting it a bit so it looks nice. Pour some of your homemade sauce over the meat, then add a pile of shredded cabbage on the side. Finish with some green onions sprinkled on top and sesame seeds if you want.
My kids go crazy for the homemade sauce every time. When I first whipped it up, my little boy said it beat the store stuff we used to buy hands down. Now we always keep some in the fridge for dipping everything from veggies to fries.
The Trick to Crispy Panko Coating
Getting that super crunchy katsu outside is all about how you handle the panko. Don't just roll the meat around in the crumbs like with regular breadcrumbs. Really press them on firmly. I found out that putting the breaded cutlets in the fridge for 15 minutes before frying makes the coating stick way better during cooking. Want it even crunchier? Try toasting your panko in a dry pan until it's light golden before you use it. This little step makes the final texture absolutely amazing after frying.
 Pin it
Turn It Into A Full Japanese Feast
Make your katsu bowl part of a bigger Japanese meal with some tasty sides. Start with a bowl of miso soup for that warm savory kick. Add some quick cucumber pickles or Japanese potato salad for a creamy contrast to the crunchy katsu. Throw in some edamame with sea salt for a fun protein-packed starter. If you've got room for something sweet, try some fresh fruit with a tiny scoop of green tea ice cream to finish things off. This whole spread gives you all the different flavors that make Japanese food so special, not just the main dish.
Keeping And Warming Leftovers
Katsu tastes best right after you cook it when it's super crunchy, but leftovers can still be great. Keep any extra katsu apart from the rice and cabbage in a sealed container in your fridge for up to 2 days. Don't use the microwave to warm it up or it'll get soggy. Instead, put it on a wire rack over a baking sheet and heat it in a 350°F oven for 7-10 minutes until it's hot and crispy again. Your sauce will last in a jar in the fridge for up to 2 weeks, so you can make a bunch ahead of time. Store cooked rice on its own and sprinkle some water on it when you heat it up to bring back the moisture.
 Pin it
Frequently Asked Questions
- → Can I bake the cutlets to make them healthier?
You bet! Pop the breaded cutlets in the oven at 400°F (200°C) for 20-25 minutes, turning them once midway. Spraying them lightly with oil first helps with browning. They won’t be as crunchy as frying, but they’ll still taste great.
- → Is there a difference between katsu and tonkatsu?
Yep, there is! Tonkatsu is a pork-only dish (the 'ton' means pork in Japanese), while katsu is the general term for breaded fried cutlets, like chicken katsu.
- → What can I use if I’m out of panko?
If you don't have panko, regular breadcrumbs will work, though they’re less airy. Gluten-free options include GF panko, crushed cornflakes, or rice cereal, all of which stay nice and crispy.
- → Can I prep the sauce in advance?
Sure thing! Make it ahead and stick it in the fridge for up to 2 weeks in a sealed container. Just stir it well before using, as it might separate a bit.
- → What should I serve with katsu bowls?
Great options include miso soup, pickled veggies (like cucumbers), a simple salad with rice vinegar dressing, or even edamame. For something heavier, gyoza is a fantastic choice!
- → How can I keep the breading from falling off?
After breading the cutlets, let them chill in the fridge for 15-30 minutes. This helps the coating stick. Also, check that your oil is hot enough (around 350°F/175°C) and don’t flip them too much while cooking.