
 Pin it
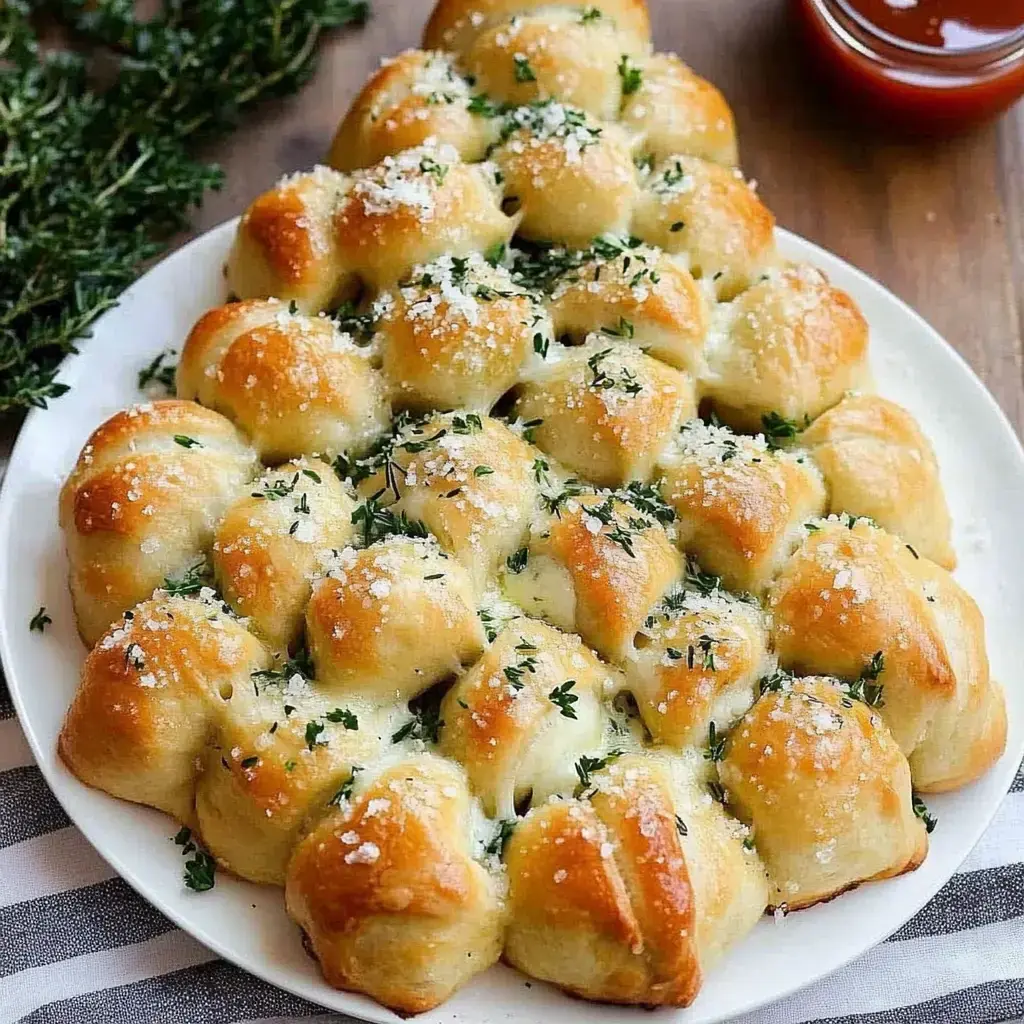
Want to dazzle your holiday crowd with something eye-catching? This Gooey Christmas Tree Pull-Apart will turn heads at any gathering! Imagine soft, fluffy bread formed into a festive tree shape, packed with melty mozzarella and garnished with herbs. The coolest thing? We're starting with ready-made pizza dough, so you'll spend more time enjoying the party and less time cooking!
What Makes This Bread a Must-Have
Hunting for that conversation-starting appetizer everyone will remember? You've found it! It's visually stunning (an actual edible Christmas tree!), and let's face it—who turns down warm bread filled with cheese? And it's much simpler than it appears—we won't tell if you don't! It's perfect whether you're throwing dinner or bringing something to a holiday potluck.
Ingredients List
- Pizza Dough: 2 cans from the refrigerated section—our time-saving trick!
- Mozzarella Sticks: 6-8 sticks, chopped into smaller pieces
- Butter: 1/4 cup, warmed until liquid
- Parmesan: 1/2 cup freshly shredded—boxed versions don't melt properly
- Fresh Herbs: Small bunch each of basil, parsley, and rosemary
- Garlic: 2-3 cloves, chopped tiny
- Egg: 1 large, for a beautiful brown finish
- Dipping Sauces: Marinara or pesto you love
- Parchment Paper: For easy cleanup
Baking Instructions
- Prepare Your Space
- Heat your oven to 400°F and cover your largest baking tray with parchment. This will be where our holiday tree comes to life! While waiting for the oven to warm up, cut those mozzarella sticks into small chunks.
- Create Your Dough Packages
- Open the pizza dough containers and slice into roughly 30 equal squares. Place a cheese chunk in each square's center, then seal the edges tightly—you don't want cheese leaking out during baking! Shape each into a smooth ball.
- Form The Tree Shape
- Now for the fun part! Arrange those balls on your tray in a triangle pattern. Start with just one at the top, then rows of two, three, and so on, working downward. Make sure they're touching each other—that's what makes it fun to tear apart!
- Add A Golden Touch
- Mix your egg with a tiny bit of water and brush this mixture all over the dough balls. This will give them that beautiful golden color when baked. Be thorough—cover every little spot!
- Bake Until Done
- Slide your tree into the oven for about 16-18 minutes. You're aiming for a nice brown top and completely melted cheese inside. Your house will soon smell fantastic!
- Add Finishing Flavors
- While it bakes, combine your melted butter with your chopped herbs, garlic, and half the Parmesan. When the bread comes out hot, brush this tasty mixture all over. Scatter the remaining Parmesan on top while everything's still steaming.
Why It's Always A Hit
This isn't just food—it's entertainment! The amazed looks when you carry out an edible Christmas tree? Worth every minute of prep! There's also something magical about everyone standing around, pulling off their own cheesy pieces and finding those pockets of gooey goodness inside.
Nailing The Details
The big trick here is sealing those cheese packets properly. You really need to pinch those dough balls shut tight—nobody wants their cheese escaping! And don't rush past the herb butter finish—that's what transforms this from good to "I need your recipe right now" amazing.
 Pin it
Crafting Your Tree
Try constructing your tree starting at the point and working down—one ball, followed by rows of two, three, and more. Don't stress if it looks a bit uneven; once it's baked and drizzled with that herb butter, it'll look stunning. Just remember to keep the balls touching—that's what creates the pull-apart magic!
Mastering The Cheese Stretch
Want those social media-worthy cheese pulls? Here's a simple trick: let your bread sit about 5 minutes after it leaves the oven. The cheese will stay wonderfully stretchy but won't be so hot that it runs everywhere. It's perfect for capturing those drool-worthy food moments!
Ready To Eat
Put this showstopper out while it's still warm, surrounded by small cups of marinara and pesto for dipping. You'll be amazed how quickly folks gather around! And here's a smart tip: keep those dipping sauces warm too—it makes the whole experience even more delightful.
Frequently Asked Questions
- → Can I use a different type of dough?
Sure thing! Roll-up dough works great, but keep it soft for best fluffiness. Fresh ones will outshine pre-made options. Just tweak the baking time if needed!
- → Can I mix different cheeses?
Go wild with varieties! Use any cheese that melts well. Sharp ones add extra flavor, and freshly grated cheeses are the real winners. Steer clear of the dry kinds, though!
- → How can I store leftovers?
Seal it tight in a box, and pop it in the fridge! It’ll last up to two days. Reheat in the oven for a crispy, warm treat—though fresh always tastes best!
- → Can I prep this earlier?
Absolutely! Shape the pieces ahead, wrap them up, and keep them cool. Just bake them fresh for warm, fresh-off-the-oven magic!
- → How can I make it spicier?
Throw in red chili flakes, or mix in some hot sauce. Spice up that butter! Start with a little, though—you can always add more, but can’t undo it.
- → What if it’s browning too fast?
Lay some foil over it, lower your oven heat, or shift the pan down. Keep a close eye to catch it just in time.
- → How do I bring this to events?
It’s absolutely best popped out of the oven fresh. Prep everything, bake at your destination if you can. If not, pack backup snacks just in case!
- → How can I make it faster?
Grab pre-made dough, cut the cheese quickly, and use just one large tray! You’ll still need some oven time, but it’ll be over before you know it!
- → Can I make a bigger version?
Yep, just double it! Use a larger tray, and add extra oven time. Spread everything out to avoid soggy centers!
- → Any tips for boosting flavors?
Fresh herbs and garlic will give it a kick. Pesto is another fantastic choice, or even a ranch-flavored butter! Just don’t go overboard and hide the cheese.
- → What if it doesn’t pull apart well?
Make deeper cuts between the bites, and leave more space as you’re arranging them. Try cutting back on the cheese if it’s stuffing the pieces too much. It’ll still be delicious!
- → Why is the cheese not melting right?
Give it a little extra time in the oven, and make sure your temperature is good. Fresh cheese melts beautifully, so stick to that. Patience pays off here!
Conclusion
Want to try more? Go with garlic swirls or buttery cheese rolls for the same crowd-pleasing vibes.